How to make a cross stitch pattern from a photo
Updated 17 November 2026
By the end of this guide you will have a printed cross stitch chart made from your own photo, with a DMC thread number for every colour and the exact number of stitches each one needs. We will use a picture of a sunflower and stitch it on 14-count Aida, about 15 cm (6 in) across.
You need: a photo, a printer, and an idea of the fabric you want to use. Everything else happens in the converter, in your browser.
1. Pick a photo that will stitch well
Cross stitch turns a photo into a few thousand small squares, so fine detail disappears. Photos that work best have one clear subject, good light and a simple background. A single flower, a pet's face or a house front work better than a crowd or a busy street. Crop the photo close around the subject before you start; every square spent on background is one less for the part you care about.
2. Add the photo to the converter
Open the converter and drop your photo on the box, paste it, or tap Choose image. The photo is processed on your own device and is not uploaded.
3. Set the finished size
Choose Craft under Size, pick your fabric under Material, and type how wide you want the finished piece to be. The converter works out how many stitches that is. Our sunflower at 15 cm on 14-count Aida comes to 83 x 83 stitches, which is 15.1 cm square.
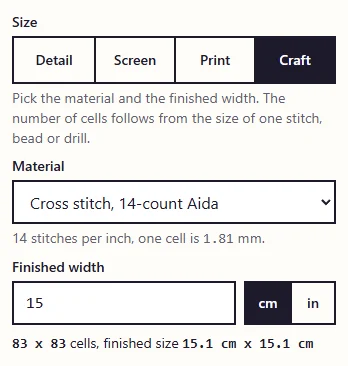
The fabric count changes everything. The same 83 stitches would be 19.2 cm on 11-count Aida and 11.7 cm on 18-count. Smaller counts mean bigger stitches, which are easier on the eyes and quicker to fill; larger counts give finer detail in the same space. The table on the converter page lists the sizes for common counts.
4. Choose DMC thread and limit the colours
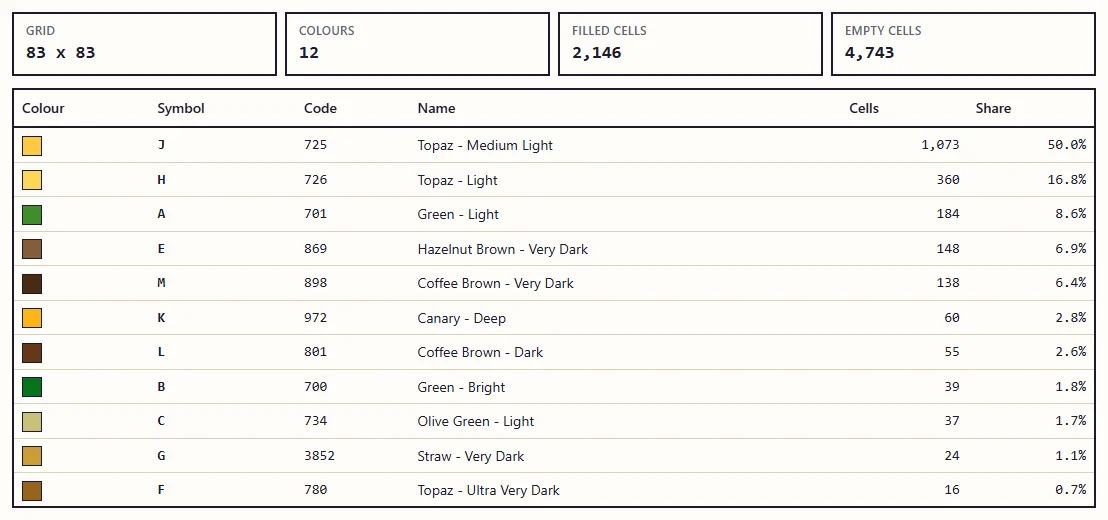
Under Palette, choose DMC floss. Every square is now matched to a real thread colour. Then set Use at most this many colours. We chose 12. Fewer colours means fewer skeins to buy and fewer thread changes, and the result often looks cleaner. Most photos look good with 8 to 20.
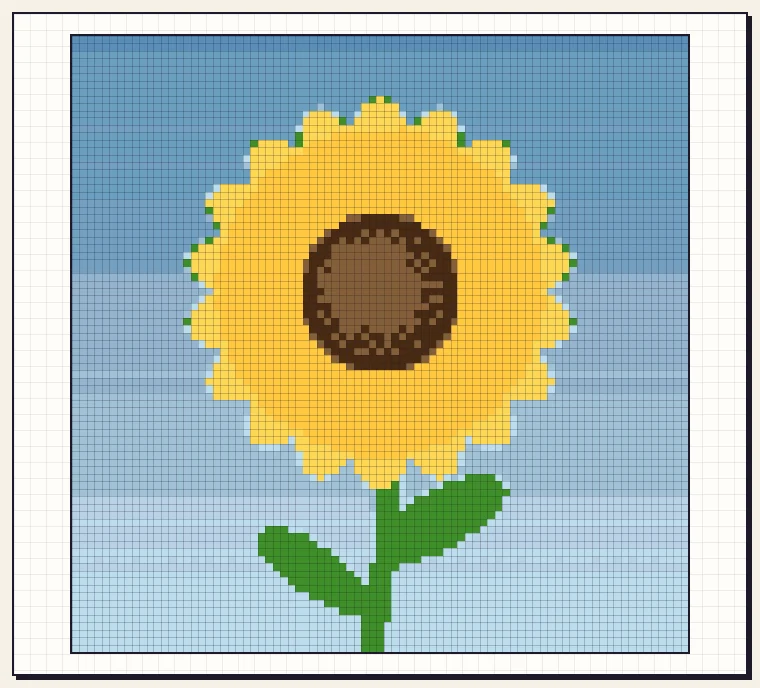
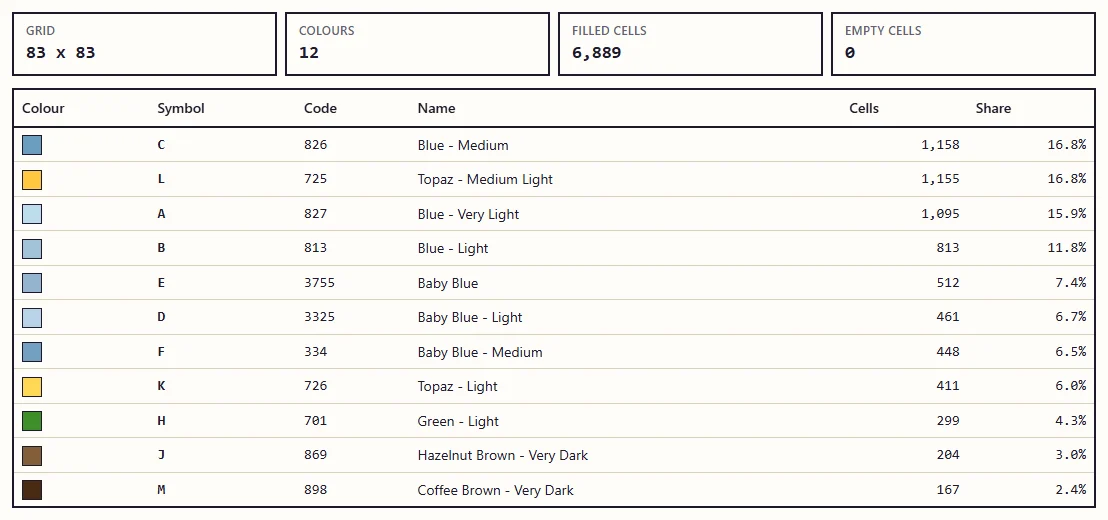
Open Make it by hand below the preview to see the colour list. Here we can spot a problem: the sky uses 7 of our 12 colours, and the whole chart is 6,889 stitches.
5. Leave the background unstitched
Many stitchers leave the background as plain fabric. Open Background and tick Remove the background around the subject. The converter clears the area that touches the edges of the picture and matches the colour in the top-left corner.
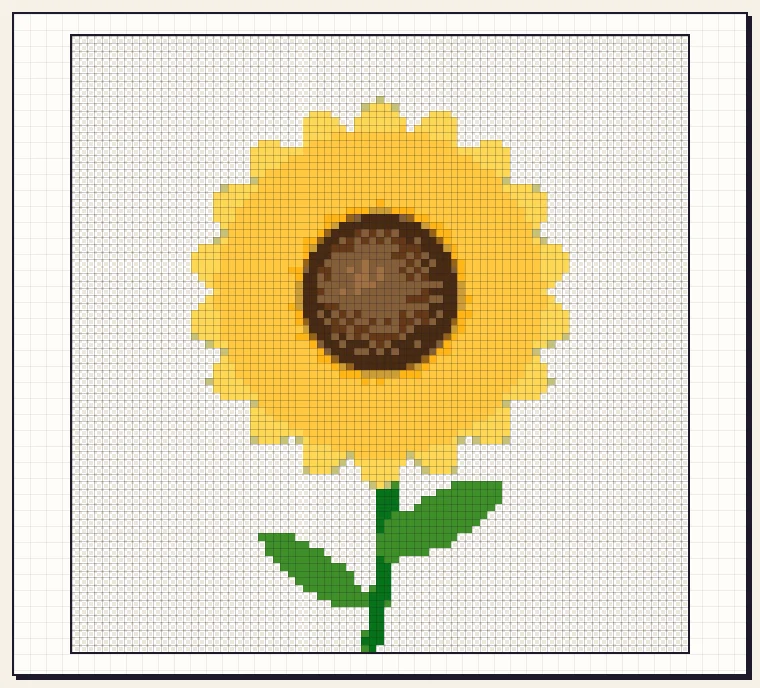
Watch the preview while you move Background tolerance. Too high, and parts of the subject vanish too: at 100, the sunflower's leaves were removed along with the sky.
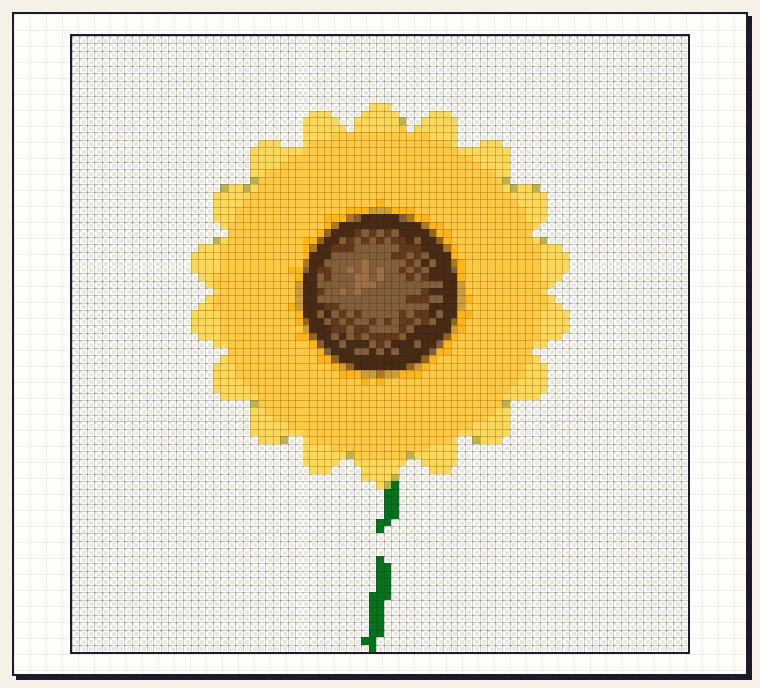
At 85, the sky is gone and the leaves stay. Now every one of the 12 colours goes to the flower, so it gets more shades of yellow and brown, and the chart drops from 6,889 stitches to 2,146.
6. Read the colour list as your shopping list
The colour list shows each thread's symbol, DMC number, name and how many stitches use it, largest first. Buy by the DMC number, not by how the colour looks on screen; screens cannot show thread colours exactly. Colours near the bottom of the list with only a few stitches are worth a look: you can often swap them for a neighbouring shade in the editor and buy one skein less.
7. Check the symbols
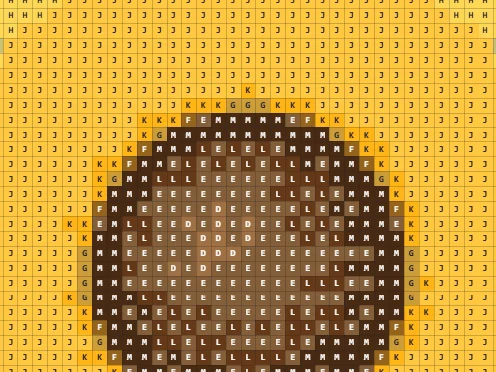
Tick Symbols above the preview to see the chart the way it will print: one letter or number per colour in every square. Zoom in on your screen if the squares are small. If two neighbouring colours look almost the same, that is a good place to simplify.
8. Download and print the chart
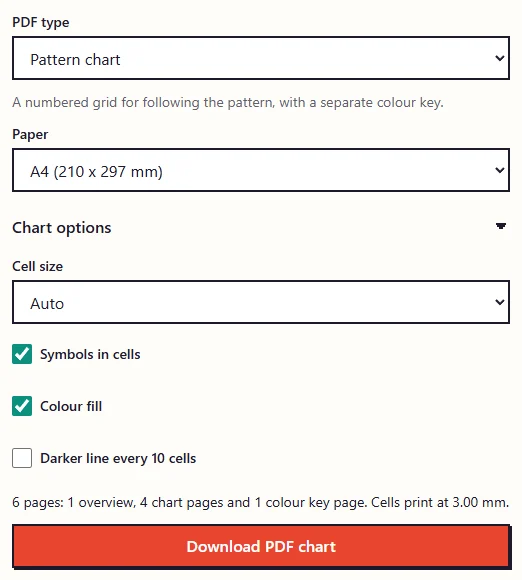
In the Printable PDF box, leave PDF type on Pattern chart, choose your paper and click Download PDF chart. Open Chart options if you want to change the symbols or colour fill. Our sunflower prints on 6 A4 pages: one overview, four chart pages and one colour key, with each square 3.00 mm wide.
- Print at 100% or "actual size". Do not let the printer shrink it to fit.
- Line up the pages using the shaded bands. The last 2 rows or columns of one page repeat at the start of the next; stitch those only once.
- Use the thick lines. There is a bold line every 10 squares, and the rows and columns are numbered on all four edges, so you can find your place quickly.
- Untick Colour fill if you want to save ink. The symbols are enough to stitch from.
Tidy up before you print (optional)
Converted photos often have a few single squares of an odd colour, sometimes called confetti. They are slow to stitch and rarely noticed in the finished piece. Click Edit pixels to open the pattern in the editor, paint over them, or use Replace colour to merge a rarely used shade into its neighbour. The counts and the chart update as you go.
Common questions
How many skeins do I need?
It depends on your fabric, the number of strands and how you stitch. Use the stitch counts in the colour list with the coverage guide from your thread supplier, and buy one extra skein of the most used colours so the dye lot matches.
Can I stitch the background instead of leaving it empty?
Yes. Skip step 5. Keep in mind that a full background can easily double or triple the number of stitches, as it did with our sky.
Why does the photo look different on fabric?
Each stitch is one solid colour, and threads catch the light differently from a screen. Stand back from the preview, or look at it small, to get a better idea of the finished piece.
Ready to try it with your own picture?
Open the converter