How to make a fuse bead pattern from a picture
Updated 17 November 2026
By the end of this guide you will have a printed fuse bead pattern made from your own picture, sized to fit one pegboard, with a count of how many beads of each colour you need. We will use a drawn strawberry on a plain white background.
You need: a picture, a printer, and your beads and pegboard. The converter runs in your browser, and your picture is not uploaded.
1. Pick a picture that suits beads
A standard pegboard is small, so a bead picture has very few squares to work with. Simple shapes with bold outlines and flat colours work best: a fruit, an animal, a heart, a game sprite. Photos with soft shading turn muddy at this size. If you start from a photo, crop it tight around one subject first.
2. Add the picture and set the size
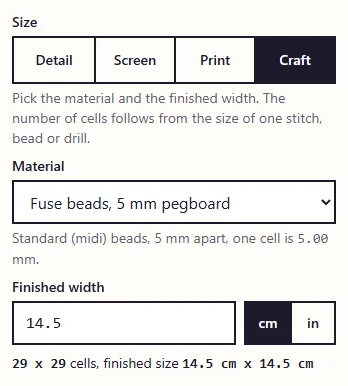
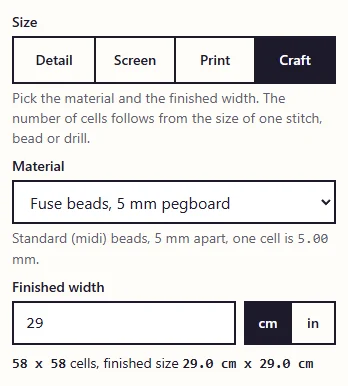
Open the converter and drop your picture on the box, paste it, or tap Choose image. Under Size, choose Craft, then pick Fuse beads, 5 mm pegboard as the material. Standard (midi) beads sit 5 mm apart, so one cell is one bead.
Type Finished width as 14.5 cm. The converter shows 29 x 29 cells, 14.5 cm by 14.5 cm. That is exactly one standard 29 x 29 pegboard, so the whole pattern fits on a single board.
3. Choose how many colours to use
Leave Palette on Free colour and set Number of colours to 6. Free colour picks the shades that suit your picture, and you match them to your bead tubs by eye. Brand bead colour lists are not built into the site yet, so the colour list shows names such as Colour 5, not bead shop codes.
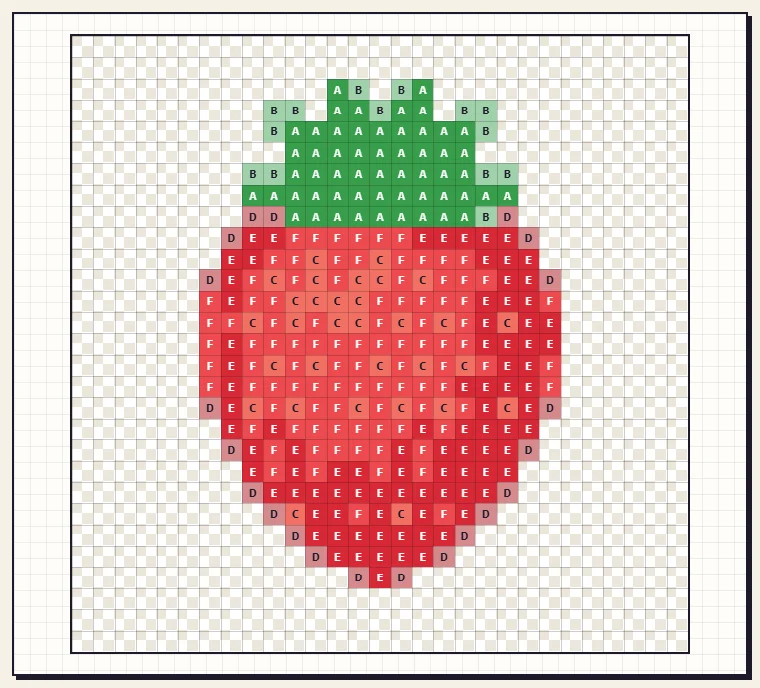
Fewer colours makes sorting easier, and for a bead picture it usually looks better too. Our strawberry ends up with a bright red, a deep red, a coral for the shine, a dusty pink and two greens. Grid lines are on by default, so each bead shows as one square.
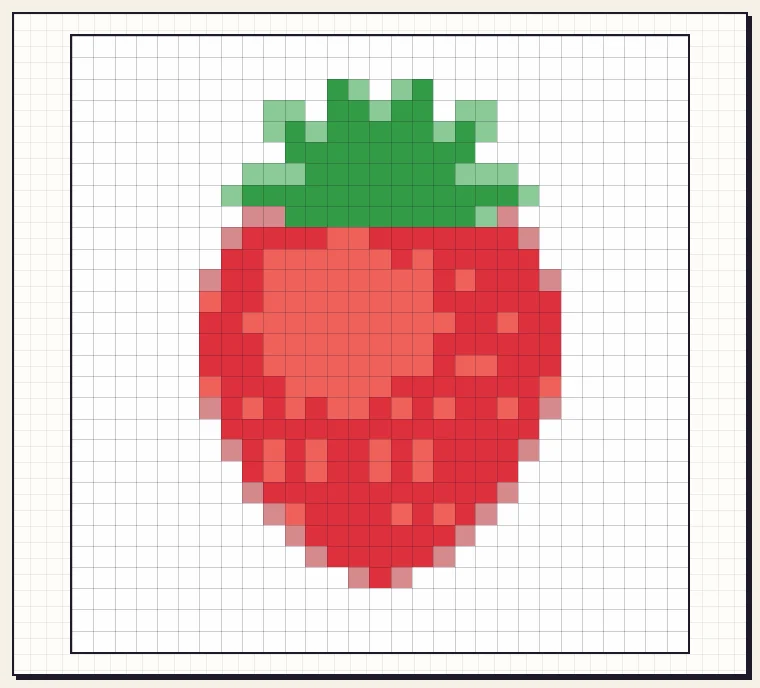
The white background is being counted as part of the picture here. All 29 x 29 cells are filled, which means 841 beads, and most of them would be white.
4. Leave the background empty
If you do not want a white block behind the picture, open Background and tick Remove the background around the subject. The converter clears the area that touches the edges of the picture and matches the colour in the top-left corner. We used a Background tolerance of 40. A higher value removes more shades that are close to the background, so watch the preview and stop before parts of the subject start to disappear.
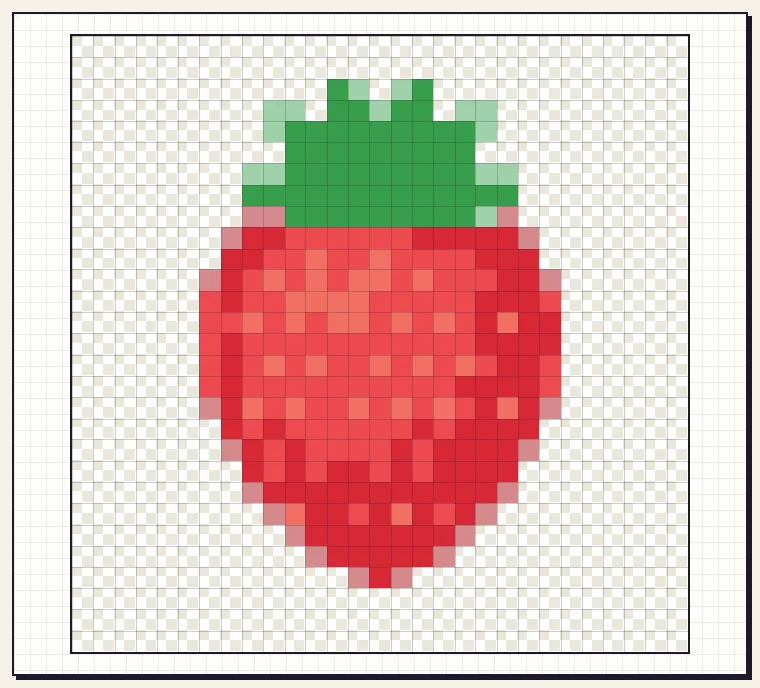
The checkerboard squares are empty cells. You do not place a bead there, so those pegs stay bare. Our pattern drops from 841 beads to 307, and 534 cells stay empty.
5. Read the colour list as your bead list
Open Make it by hand below the preview. The list shows each colour with its symbol and how many beads it needs, largest first. Our strawberry needs 96 beads of the bright red, 90 of the deep red, 55 of the dark green, 31 of the coral, 21 of the dusty pink and 14 of the light green. Pour out a few more than each number before you start, since beads roll away and sometimes crack.
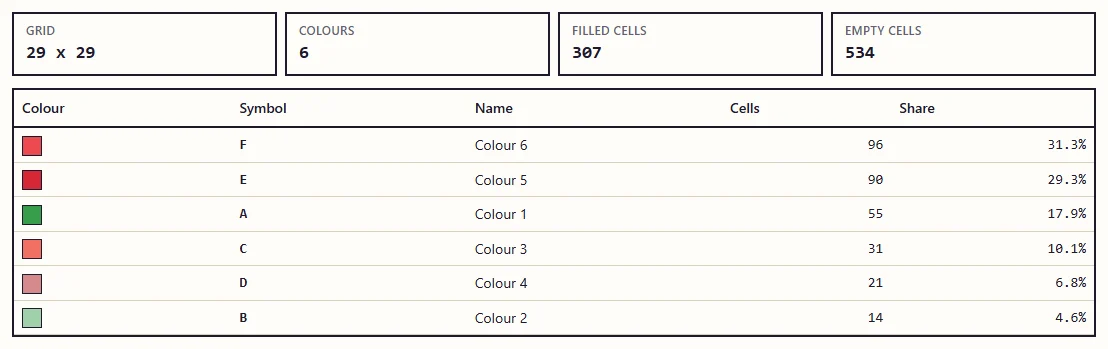
If a colour at the bottom uses only a handful of beads, you can often swap it for a similar shade you already own. Click Edit pixels and use Replace colour to merge it into its neighbour. The counts update as you go.
6. Check the symbols
Tick Symbols above the preview. Every filled square now shows the letter of its colour, the same letter as in the colour list. This is the view to work from when you lay out the beads row by row. If two colours are hard to tell apart on screen, label your bead tubs with the letters.
7. Print the chart
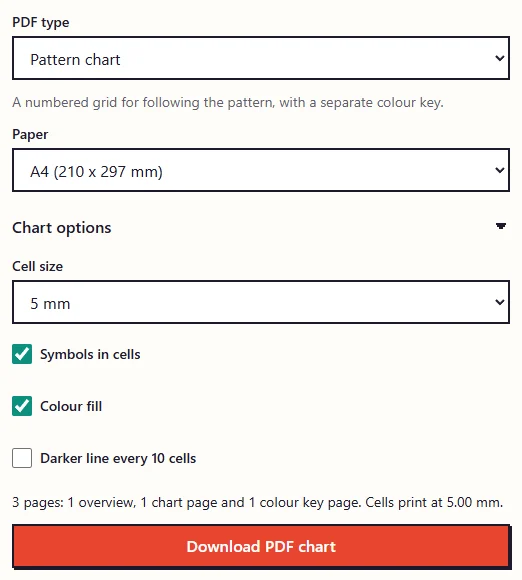
In the Printable PDF box, leave PDF type on Pattern chart and choose your paper. Open Chart options, set Cell size to 5 mm and click Download PDF chart. Our strawberry makes 3 pages: one overview, one chart page and one colour key. Each cell prints at 5.00 mm.
- Print at 100% or "actual size". Do not let the printer shrink the page, or the cells will no longer be 5 mm.
- One idea: because 5 mm is the spacing between pegs, you can slide the printed chart under a clear pegboard and place each bead over its matching square.
- Untick Colour fill to save ink. The symbols are enough to follow.
8. Go bigger with more boards
Set Finished width to 29 cm and the converter shows 58 x 58 cells, 29.0 cm by 29.0 cm. That is four standard boards placed in a 2 by 2 square, each holding one quarter of the picture.
Tips
- Start from the middle of the picture and work outwards so the shape stays centred on the board.
- Follow your bead maker's instructions for ironing, including which paper to put between the iron and the beads.
- Squint at the preview or look at it small. If the shape reads clearly, it will read clearly in beads.
Common questions
Can I use mini or large beads?
The fuse bead size in the converter is for standard 5 mm beads. You can still use the pattern with other beads, but the finished width shown will not match your beads.
Will the colours match my beads?
Not exactly. Screens cannot show bead colours precisely, so use the preview as a guide and pick the closest beads you own.
Ready to try it with your own picture?
Open the converter