How to make a diamond painting pattern from a photo
Updated 17 November 2026
By the end of this guide you will have a diamond painting pattern made from your own photo, with a colour number for every symbol and the exact number of drills each colour needs. We will use the converter's built-in sample picture, a red apple on a table, at 30 cm wide.
You need: a photo and a printer. Everything else happens in the converter, in your browser, and your photo is not uploaded.
1. Pick a photo
Diamond painting covers the whole canvas, so the picture has to look good edge to edge. Photos with a clear subject, strong light and smooth backgrounds work best. Crop close around the subject before you start, so more drills go on the part you care about. You can also tap Use a sample picture to follow along with ours.
2. Set the finished size
Open the converter and add your photo. Under Size, choose Craft, then pick Diamond painting, 2.5 mm square drills as the material. Type Finished width as 30 cm. The converter shows 120 x 90 cells, 30.0 cm by 22.5 cm. Each cell is one drill, so this canvas needs 10,800 drills in total.
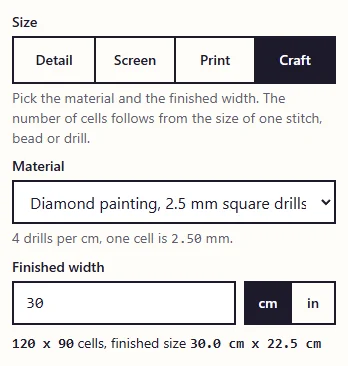
A diamond painting normally fills the whole canvas, so leave the Background option off. Every cell gets a colour.
3. Choose DMC colours and limit them
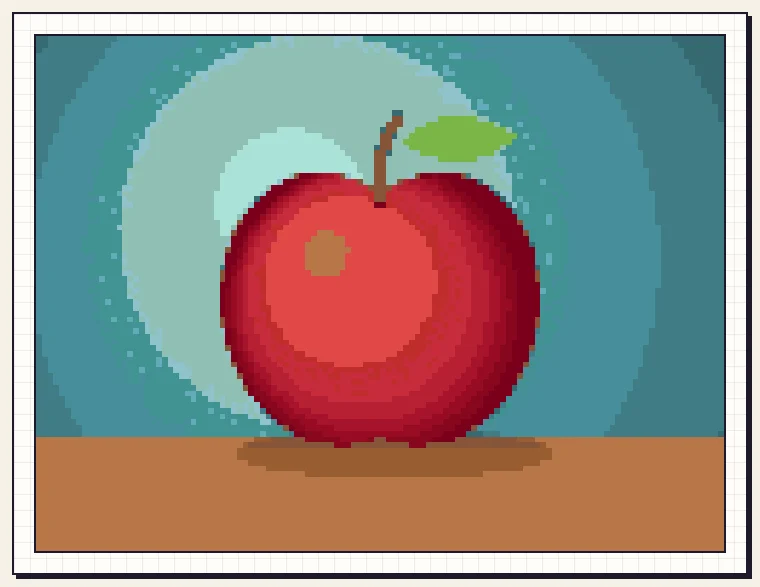
Under Palette, choose DMC floss. Many drill sellers label their colours with DMC numbers, so this gives you a list you can shop from. Check with your seller that their numbers match before you order. Then set Use at most this many colours. We chose 20.
4. Read the colour list
Open Make it by hand below the preview. It shows 20 colours and 10,800 filled cells with no empty ones. Each row has the symbol, the DMC number, the colour name and how many drills you need, largest first. In our apple, the brown table is the biggest group at 2,111 drills, followed by four turquoise and aquamarine shades for the background, then the reds of the apple.
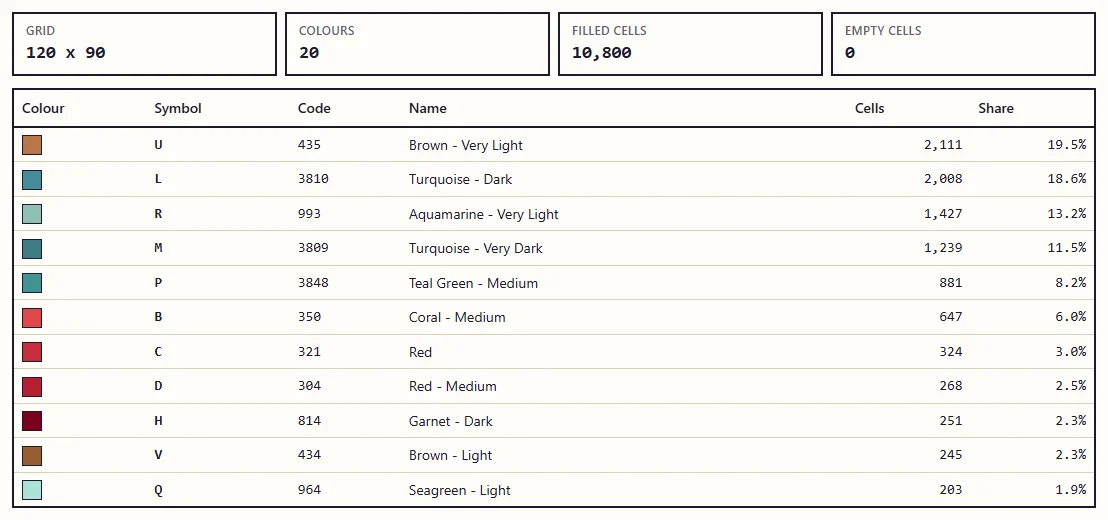
Many suppliers sell drills in bags, so treat these counts as a minimum and order a little extra of each colour. The colours near the bottom of the list use the fewest drills, and they are often small details such as the stem and highlights.
5. Try fewer colours
Fewer colours means fewer bags to sort and fewer symbols to keep track of. Here is the same apple with Use at most this many colours set to 8. The apple has lost its fine shading and the background rings turn into flat bands, but the shape is still clear. You still need 10,800 drills. You just sort them into fewer piles.
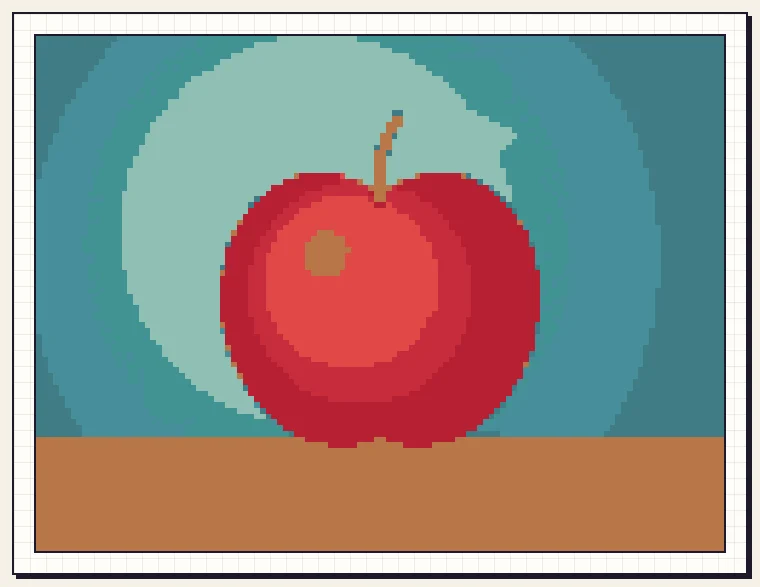
Switch between the two settings and pick the one you would enjoy working on. For a first project, a lower number is a good choice. Anything between 8 and 20 works for most photos.
6. Check the symbols
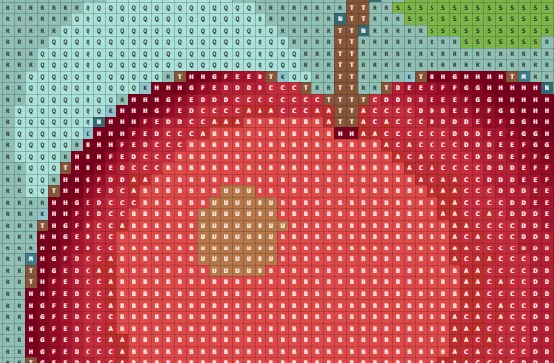
Tick Symbols above the preview. Every square shows the letter of its colour, the same letter as in the colour list. This is the view that matches a printed chart. Zoom in on your screen if the squares are small.
7. Download and print the chart
In the Printable PDF box, leave PDF type on Pattern chart and choose your paper. Under Chart options, leave Cell size on Auto. Our apple makes 8 pages: one overview, six chart pages and one colour key, and each cell prints at 3.00 mm.
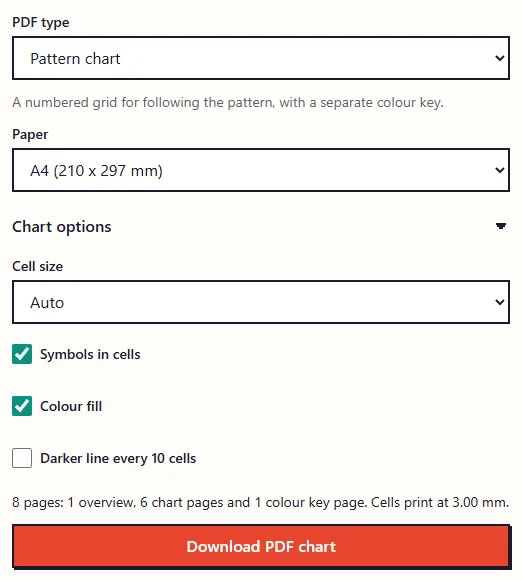
This chart is for reading, so the converter picks a size that is easy to see, and it is not the same as the 2.5 mm drill. It is not a canvas to stick drills on. If you want a printed canvas with sticky drill spots at exactly 2.5 mm, that needs a print shop.
- Print at 100% or "actual size". Do not let the printer shrink it to fit.
- Use the thick lines. There is a bold line every 10 squares and the rows and columns are numbered, so it is easy to find your place on a big pattern.
- Untick Colour fill if you want to save ink. The symbols are enough to work from.
Tips
- Square drills fit the grid exactly. Round drills leave small gaps between them, so a round-drill picture looks a little softer.
- Tidy up before you print. Converted photos can have lone squares of an odd colour. Click Edit pixels to open the editor, paint over them or use Replace colour to merge a rarely used shade into its neighbour.
- Do a small corner first and see how the colours look with real drills before you commit to a large canvas.
Common questions
Will my drill kit match this pattern?
The converter makes its own pattern from your photo. It will not match a kit you already own, so use it for a new canvas or a custom picture.
Why does the photo look different with drills?
Drills sparkle and catch the light, and each one is a single flat colour. Stand back from the preview or look at it small to get a better idea of the finished piece.
Ready to try it with your own picture?
Open the converter